You want to start test automation with Python, but you have no idea how to start? Have you ever had problems with setting up the environment for your tests? Or you just want to do it in a good way for the first time, instead of trying multiple solutions?
I’m writing automation with Python and Selenium for three years now, and this post describes how I’m starting my projects (after many tries – and sadly failures) which allowed me to finally find a way that makes everything simple and fast. This will allow you to easily manage packages needed for your automation, quickly set up the environment on a new machine and take good use from future posts on this blog (describing ways to run all tests from different locations with a simple script, changing browser options).
At the beginning, you need to install the newest version of python. Download and install it from:
https://www.python.org/downloads/
You can get any IDE you want – my example will be based on PyCharm community edition:
https://www.jetbrains.com/pycharm/
Install and open it.
If you are using it for the first time Click ‘+ Create New Project’, else go to File -> New Project. Choose your location and click Create. You can select a project interpreter as ‘New environment using virtualenv’ (recommended). If so you can skip the next chapter.

Setup virtual environment:
Virtual environment allows you to manage packages used in your project, prepare file containing all package needed, and install all of them with one command
Check if you have virtual environment installed by typing this in your command line:
virtualenv --versionIf not installed:
pip install virtualenvGo to folder that will contain your project and add virtual environment were venv is name of your virtual environment:
virtualenv -p python3 venvOn Linux it should contain folder bin, on Windows Scripts. In both systems there should be file activate.bat inside this folder

Installing packages needed:
To start the automation you need to download selenium library and pytest. Pytest is toll that allow you to run your automation, generate test results and rerun tests that failed. You can use your system terminal (or cmd on Windows) or Python terminal version inside PyCharm. Open terminal and go to your project folder (if you are using Pycharm terminal you should already be in correct folder).
cd path/to/your/folder – Linux
cd path\to\your\folder - Windows
At the beginning activate virtual environment (so packages will be installed inside it):
source venv/bin/activate - Linux
venv\Scripts\activate.bat – Windows
Install packages:
pip install selenium– allows you to use selenium engine in test automation
pip install pytest– allows you to run tests and manage its results
pip install pytest-rerunfailures– allows you to automatically rerun failed tests
You can use:
pip freezeTo see all installed packages and you can save it into requirements.txt file
pip freeze > requirements.txtSo next time you will set up this project elsewhere you can easily install all requirements by typing:
pip3 install -r requirements.txtAt the end you can deactivate venv:
deactivate
Check if all is correctly setup in PyCharm:
In Pycharm Go to File -> Settings -> Tools -> Python Integrated Tools and in Testing choose ‘Default test runner’ as pytest.
Also in setting go to Project: YourProjectName -> Project Interpreter and check if project interpreter is correctly chosen to ‘virtualenv at YourProjectPath/venv/bin/python’. If not select the correct one from Project interpreter dropdown. You can also install packages from here instead of the console (to do it click ‘+’ button and search for the needed package)

Create your first test:
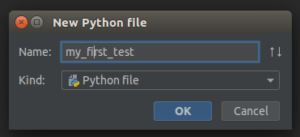
Go to file -> new -> python file and name it my_first_test and click ok

If you want to run your tests in UI you need to have a given browser installed on your machine, and you need to download the correct driver for selenium (chromedriver for chrome and geckodriver for firefox). Put this file into your project and get full path to it – you will need to put it into code below instead of ‘your_driver_path’. Open the file and paste this code to it (for pytest all test cases should begin with ‘test_’):
from selenium import webdriver
import os
from pathlib import Path
import time

folder_path = str(Path(__file__).parents[0])

def test_my_very_first_test():
driver = webdriver.Chrome(os.path.join(folder_path, 'chromedriver'))
driver.get("http://www.google.com")
time.sleep(3)
Right click on the file and choose “Run ‘pytest in test_my_first_test.py’”

You can also start your tests from terminal by:
venv/bin/python -m pytest --reruns <number_of_reruns> --junitxml=<path_to_save_results> <file_name>--reruns <number_of_reruns>-> this is optional and allows you to automatically rerun failed tests
<path_to_save_results>-> path to folder where results from you automation will be saved
<file_name>-> file that contains your test cases
You can also add:
-k <test case_name>at the end of this command to run only one test case from given file.

All should work correctly and you are ready to mess with test automation using Python! If everything works you are now in a good position to start your automation skipping multiple problems that I’ve met when I was learning it. Good job and good luck on your future projects!

